Handout to Deal With Out of Office Assistant Not Turning Off Issue
Overview of Out of Office Assistant
Problem Statement
Solution to Resolve the Problem of Malfunctioning Out of office Assistant
Admin Options to Disable Out-of-Office Assistant
There are three distinct admin side
Method 1
Go to the Microsoft 365 portal.
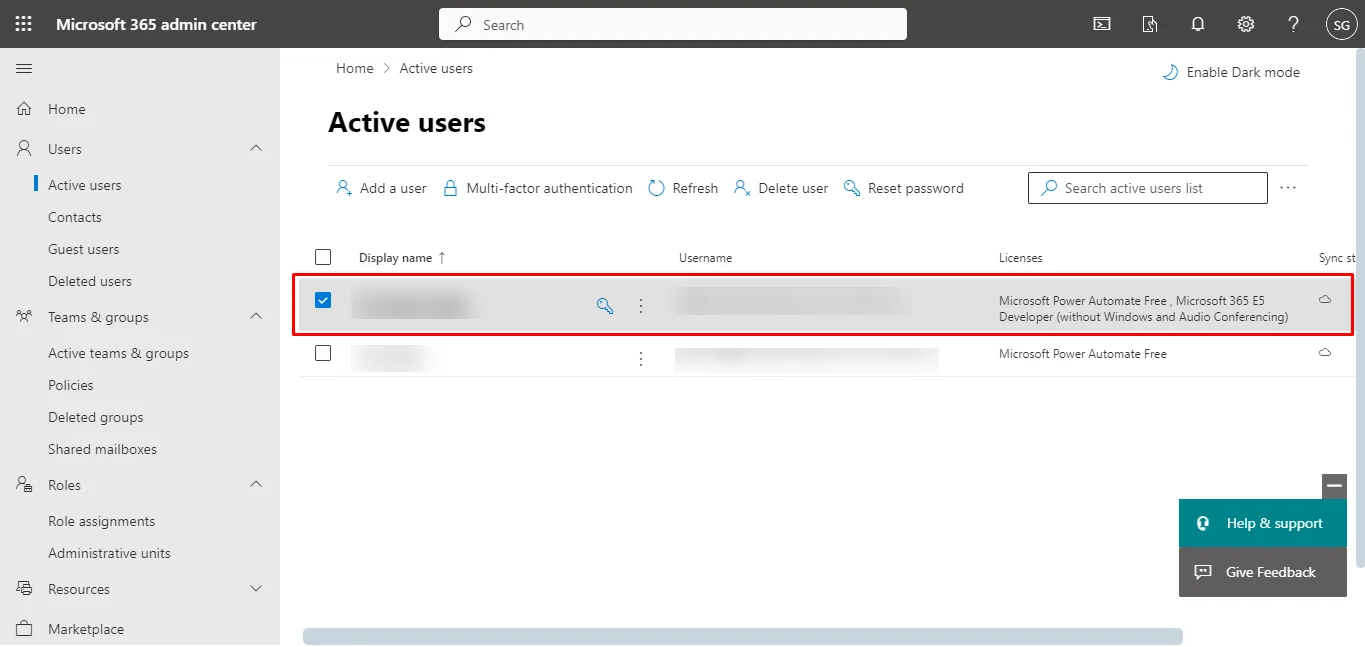
Expand Users > Select Active Users. (If you don’t see this option click on View All on the left pane)
Choose any user with a Microsoft Exchange mailbox.
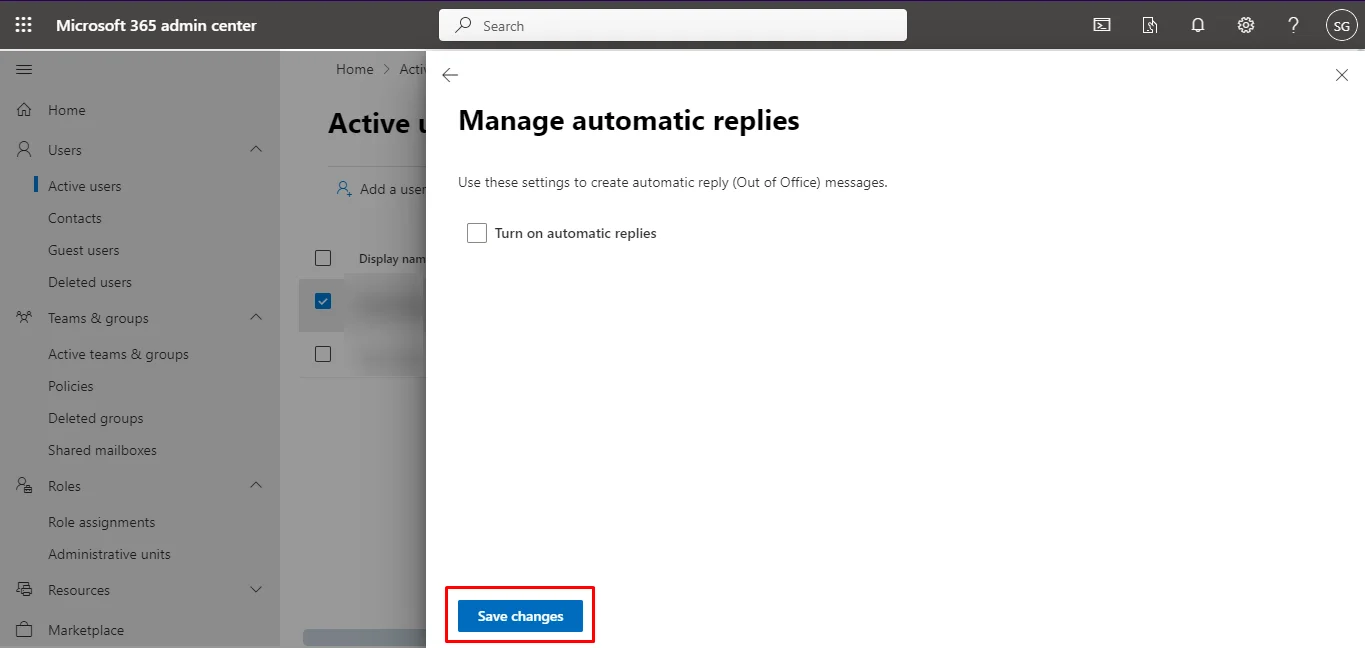
On the right menu pane select Mail settings > Automatic replies.
Uncheck the box and hit Save Changes.
Method 2 Using EAC
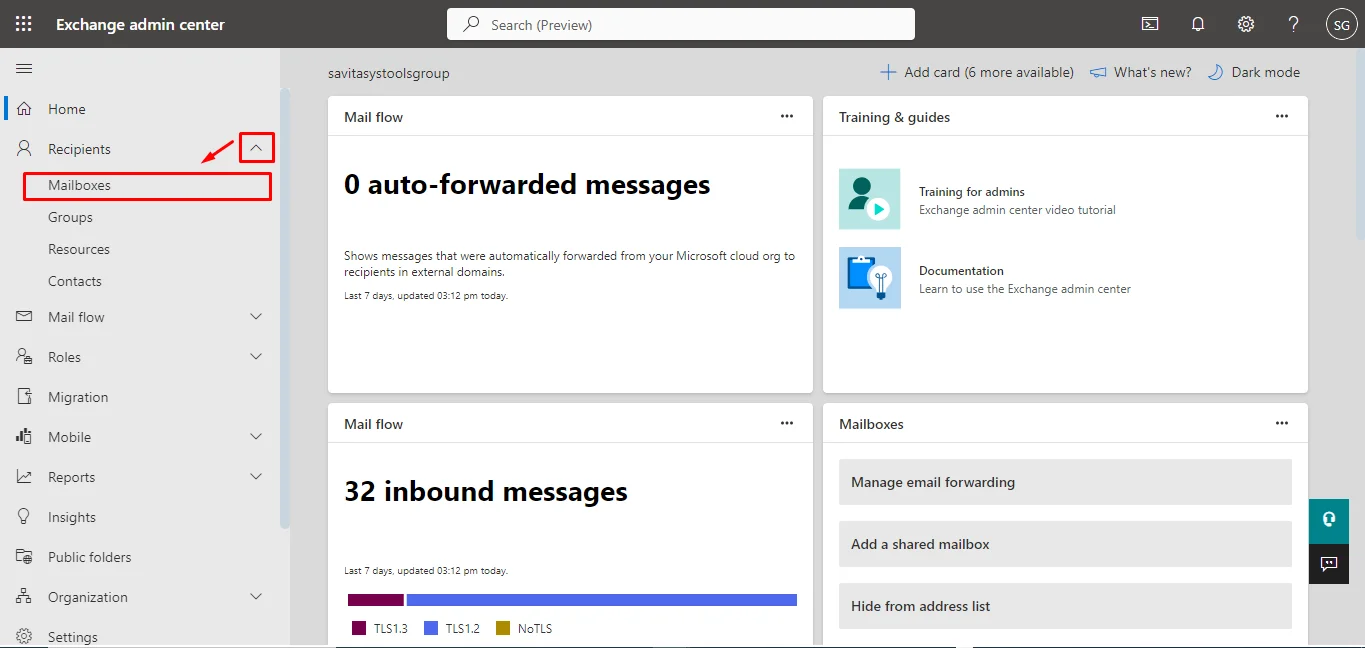
In the left pane of your Microsoft 365 admin portal hit the Expand Admin Centers tab and pick Exchange.
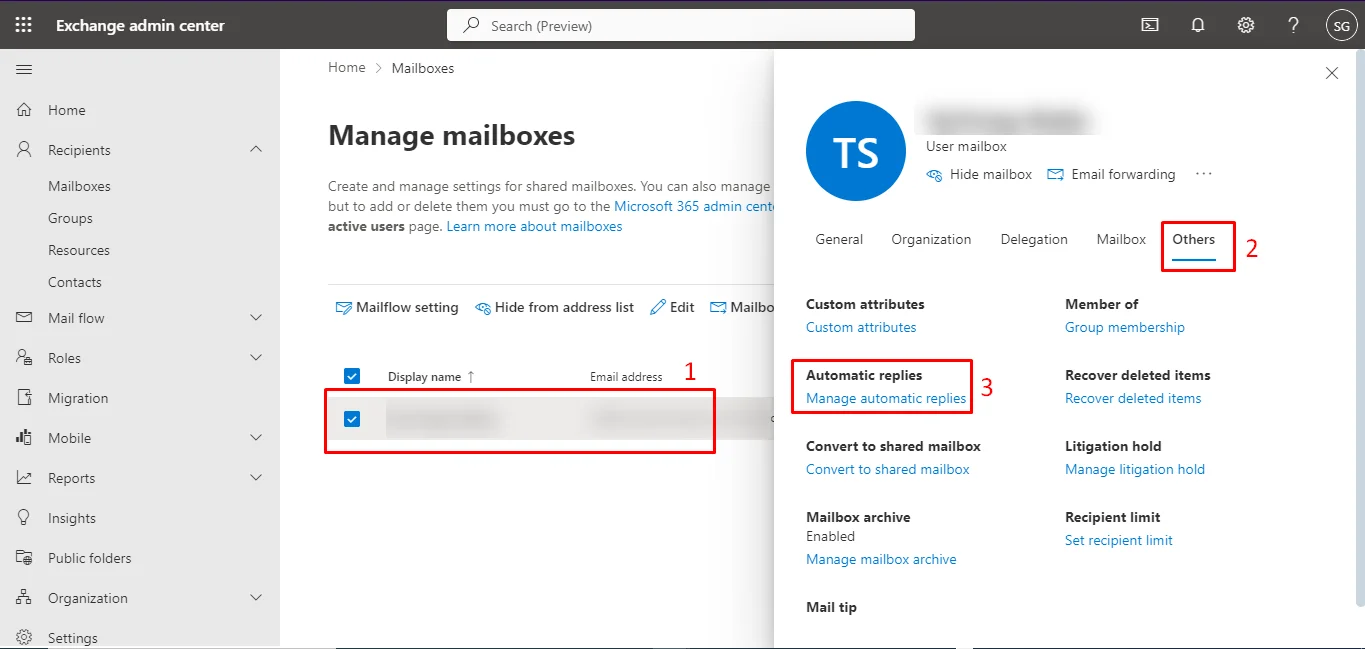
This takes you to the EAC. There you need to expand the Recipients section and open Mailboxes
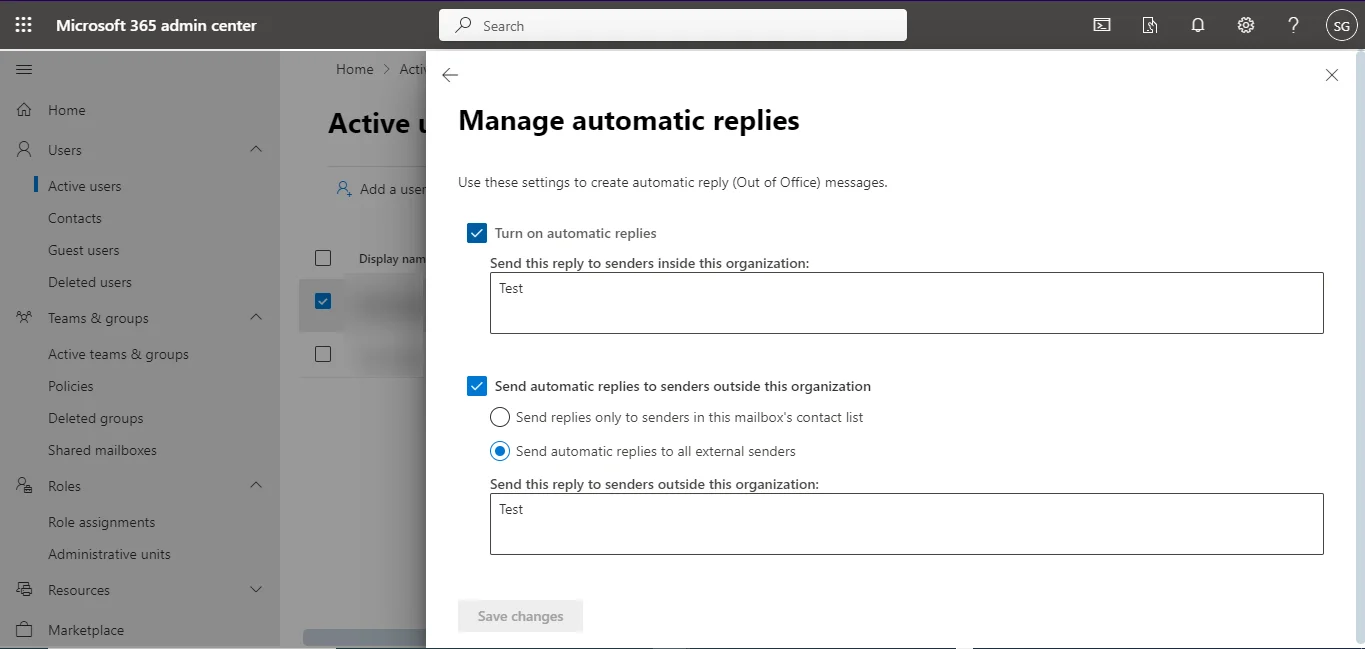
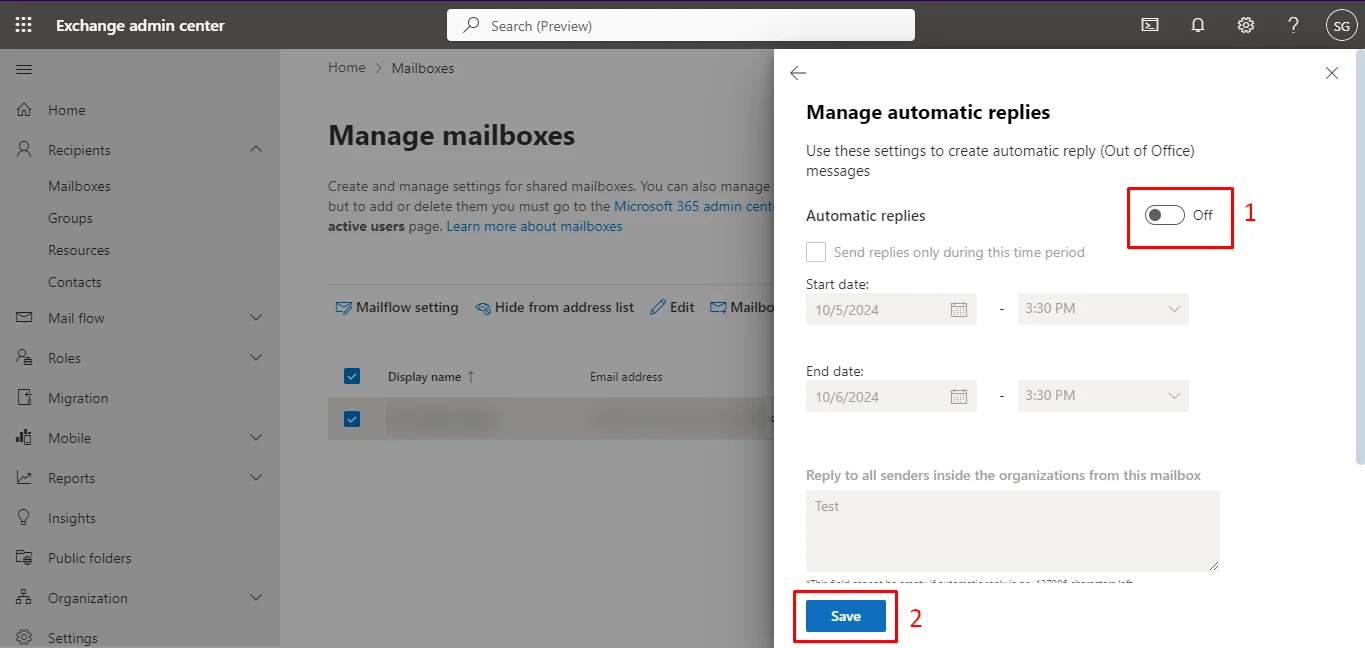
In the Manage Mailboxes screen, click on a user to open the flyout menu on the right, and go to Others > and click on Manage automatic replies.
Change the switch to the Off position and Save.
Method 3 Using PowerShell
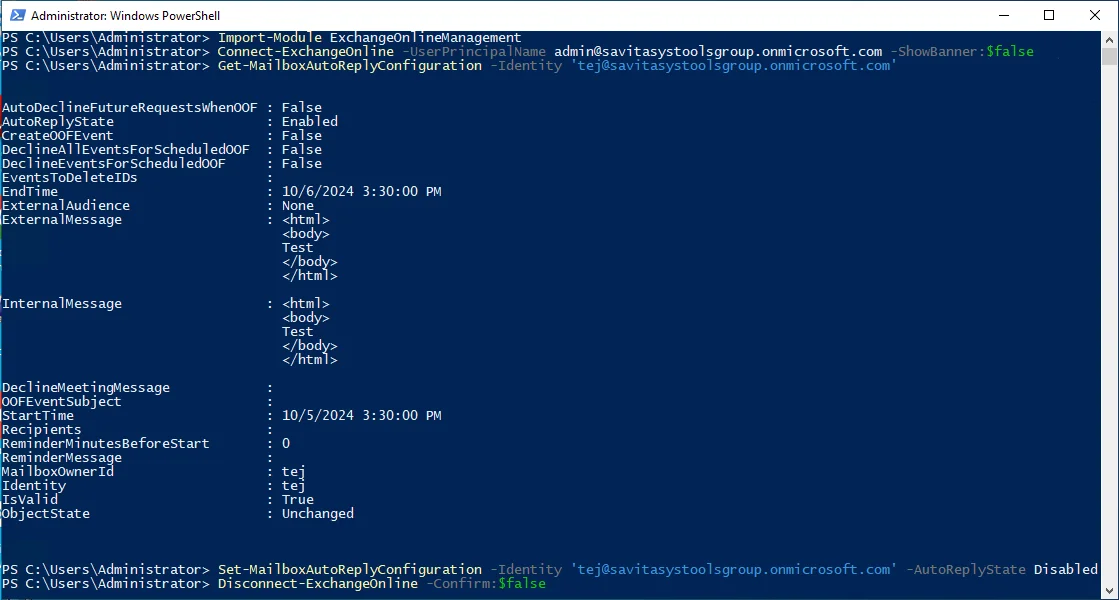
Launch a PowerShell Instance and type the following (one by one):
Import-Module ExchangeOnlineManagement
Connect-ExchangeOnline -UserPrincipal Name <AdminUPN> ShowBanner: $false
Get-MailboxAutoReplyConfiguration Identity <UserID>
Set-MailboxAutoReplyConfiguration Identity <UserID> AutoReplyState Disabled
PS
Disconnect-ExchangeOnline -Confirm: $false
User Level Actions to Turn off Automated Replies
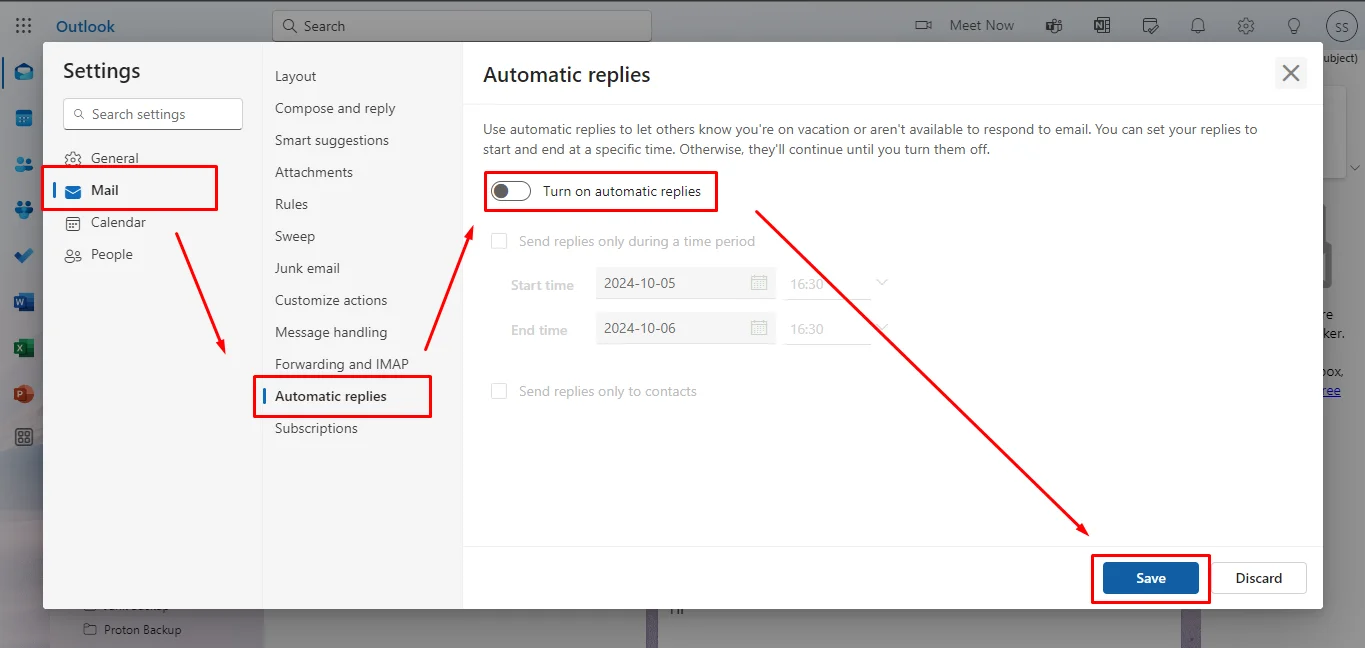
If you have set the Automated Reply recently then when you log in to the Outlook Web (M365 edition) you will see an “Automated Reply is on” alert at the top right corner.
In the same alert, there is an off-switch use it and resolve your problem.
If you don’t see this pop up no need to worry just follow these steps:
- Click on Settings Gear.
- Open the Mail tab and Go to the Automatic Replies Section.
- Toggle the Automatic Replies slider to the Off position.
- Hit the Save button in the bottom right corner.
Alternative Technique 1: Using Legacy Outlook Web Application
- From OWA 2003
Take the cursor on the left-hand side of the OWA window, go to the Options panel, and then disable OOA from it. - From OWA 2007
Move your cursor towards the right-hand side of the OWA 2007 window and turn off the OOA option from there. - From OWA 2010
To disable the option, go to Option >> Organize E-mails and then disable the Automatic replies by selecting it. - From OWA 2013
Click on the Gear icon of OWA 2013 and next to your name select the Set automatic replies option and disable it from there.
Technique 2: Using Disabled Items
Technique 3: Managing Rules & Alerts
- In Outlook 2002/XP and earlier versions: Tools >> Rules Wizard
- In Outlook 2003 and 2007: Tools >> Rules and Alert
- In Outlook 2010/2013 and 2016: File >> Section Info >> Manage Rules and Alerts
Technique 4: Using MFCMAPI
- Close Outlook from your system and start MFCMAPI.exe
- Go to Session >> Logon and Display Table
- Select your Outlook profile and then click OK
- Now you will be able to view a list of configured emails stored within your account
- From the bottom of the window pane, search for the PR_OOF_STATE property
- Take a look at the Value column of the above property and you’ll find it True. Now to disable the feature, double-click on the PR_OOF_STATE property
- Press OK to terminate the current window
- Log off your session & again open Outlook
Observational Verdict
Frequently Asked Questions
This is quite common if you have multiple email accounts set up inside the Outlook client. Auto-reply (formally Out of Office) is only available for emails directly serviced by Microsoft (i.e. Outlook and Hotmail).
Why does my classic Outlook client still send out replies even after turning off the out-of-office setting?
Classic Outlook has a feature to set up rules that can reply to a mail with a pre-set template if specific conditions are met. You may have set up such a rule in the past. To remove it
- Go to File then select Manage Rules & Alerts.
- Inside the Rules and Alerts dialog box, select the E-mail Rules tab, and pick the one you believe is responsible for auto reply.
- Click on Delete and confirm by hitting OK.
